This is another piece for the HSF challenge. The category for this fortnight is "Under It All". I've had this piece in mind since day one. I mean, really, who can't use more chemises?!
I'm going to apologize right now for the loathsome photos. Didn't sleep a wink last night and started a new position as a nanny today. I'm completely exhausted and had no energy for styling my hair let alone standing outside in 30 F weather for better lighting. In short I was lazy and my photographer doesn't get home from work early enough for outdoor lighting anyhow.

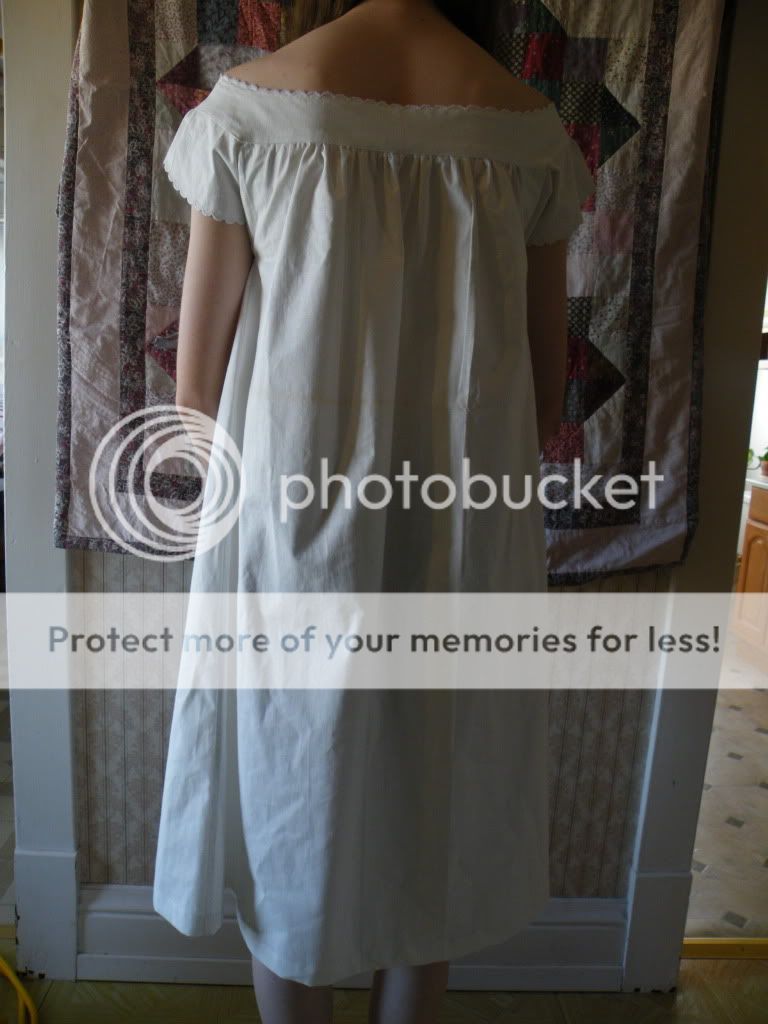
The fabric is actually a 50+ year old hospital bed sheet. 100% cotton.The story is thus - a small jailhouse in rural Missouri was preparing for the Cuban missile crisis these sheets were one of the things they stocked up. My cousin rescued them a couple years back and they've come in fabulously handy! They're completely sturdy even after being washed and ironed their quite stiff and crisp. I'm told that's because that's what *good* sheeting is like. Unfortunately the majority of them have some water stains. They can often be over looked or cut around so its all good. Only notion used is thread.

I'm hoping its far enough off shoulder that it won't show on future party dress necklines that will expectantly hit me on almost the same spot. It will be first worn in May or June. Depends on the dresses I choose to wear for which events.

I technically didn't use a pattern. I made a relatively farby chemise, using a McCall's pattern I don't have the number for, several years ago. I loved it because it doesn't show at my neck line when I'm wearing boat necks nor does it have tacky sleeves sticking out my short/open sleeves. Frankly there's nothing wrong with that, but my OCD side has to show its self and in turn underpinnings peaking out is one of my biggest peeves. However, the whole reason for wearing a chemise is to protect ones dresses from perspiration and - equalling less washings, etc. So this little, sleeveless thing was completely useless in that regard... Not to mention its way short like barely to my hips/dropped waist - tho that does work okay for me most the time. I'm hoping to alleviate the need for wearing a petti under my hoop. It was also very narrow width wise. SO....I layed the existing chemise down on my fabric traced the armscye curve and then just free handed everything else from there. Added about a foot in length (was able to use the original sheet hem = win!) Next I took the original yoke shape and copied it pretty much exactly.

I actually used the pattern from a modern blouse sleeve pattern as a base for the sleeves (yes, I'm prepared for a wet snood lashing, not with standing - the armsyce curve matched PERFECTLY). Its basically nothing like the original thing, but it gave me somewhere to start and also made me feel little more comfortable diving in, I guess. I made it way narrower and much shorter then the existing pattern. White cotton it like gold around here and I would have hated to waste any... haha They're essentially an elemental raglan style. So they are sewn into the armsyce and then gathered to the yoke as part of the neckline. I had been planning on gathering the bottom and adding a very narrow band (mainly cause I thought it'd look cute), but once I tried it on I thought better of it- the circumference of my bicep fluctuates frequently and I can't stand sleeves that end up being to tight after a couple weeks containing more physical activity then I usually experience and...poof...there goes any comfort there ever was. Anyway I ended up doing a 1/4 hem. That way if I'm not happy with the length then it will be easier to change.

I made it for use in 1860-65. I wouldn't swear by its accuracy. I, of course, used all period correct techniques and personally think the shape is suitable. Any thoughts y'all?
It took me around 4-5 hours I think. Everything is hand gathered and I had to rip the yoke of and redo it all since I had the sleeves spread to far forward and back on the first round. It was cutting into my underarm and I didn't see that being to fun to deal with. All seams are flat felled, as well, and of course I hand whipped the yoke down on the inside. Top stitching just kinda turns me off when it comes to most things. Total cost is: $0.50 Yep, you read that right! 50 cents! These are the kind of project I love. ;)
And that's the happy ending of a story about a girl who got the chemise of her dreams!!! Hey! its the little things right? Its really got me itching for an event now...only a few more months.
Love,
Brooke